Changelog
TOC
Open TOC
TODO
- 音乐与视频播放优化
- 仅考虑小破站的资源,添加
autoplay=0避免自动播放
- 仅考虑小破站的资源,添加
- LaTeX 公式优化
2024.7
- 云服务器过期但是不想续费…
- 考虑在 Vercel 上部署静态博客,同时将个人主页 social icons 放置在博客中,将个人主页废弃
- 将自己部署的 memos 废弃,采用简单的 heynote + wechat sync 方案
- changelog 单独放在一个 tab 中,与 posts 区分
2024.2
npm i is-interactivenpm i astro-expressive-code除了可以配置代码块主题外,还有一些有趣的特性:
- ANSI escape sequences
ANSI colors:- Regular: Red Green Yellow Blue Magenta Cyan- Bold:    Red Green Yellow Blue Magenta Cyan- Dimmed:  Red Green Yellow Blue Magenta Cyan
256 colors (showing colors 160-177):160 161 162 163 164 165166 167 168 169 170 171172 173 174 175 176 177
Full RGB colors:ForestGreen - RGB(34, 139, 34)
Text formatting: Bold Dimmed Italic Underline- Marking full lines & line ranges
// Line 1 - targeted by line number// Line 2// Line 3// Line 4 - targeted by line number// Line 5// Line 6// Line 7 - targeted by range "7-8"// Line 8 - targeted by range "7-8"- Using diff-like syntax
this line will be marked as insertedthis line will be marked as deletedthis is a regular line2023.9
flow
开发『数字生命』
DIKW 模型将广义上的知识分为 Data - Information - Knowledge - Wisdom 四层金字塔结构。经过近三年的试错,目前我尝试通过分层的方式构建自己的「知识体系」,其信息流如下:

- Data: 外界收集的零散信息,如某乎的收藏夹、小破站的稍后再看,这些信息当然也包括一些取悦自己的内容
- 经过筛选后的可能有价值的信息会记录到我自己部署的 memos 中,当然 memos 实际的作用是一个轻量级的多端同步备忘录,比如我用手机刷小破站刷到一个一眼有价值的信息,可以直接记录到 memos 中,而无需放入到稍后再看中,后期还要专门花时间筛选清理
- 一些可以直接列入 todo list 的 project 例如 csdiy,可以直接记录到 notion 中

- Information: 通常在 notion 或飞书云文档中完成
- 这两款应用的共同点是原生支持层级树形结构的笔记记录。层级结构中的不同层级,在传统的笔记软件例如 Typora 中,通常通过文件系统 (文件夹和文件) 或者 Heading (最多支持到 H6) 的方式体现
- notion 在完成了学生认证后拥有了无限制的云端存储,原生支持 markdown 导出,当然也存在一些迁移上的小障碍 (见
2023.7 - notion) - 由于某些不可抗力,一部分笔记 (hugegraph, iotdb) 的记录在飞书云文档中完成,可以使用 feishu2md 实现 markdown 导出
- Knowledge: 在 typora (obsidian) 构建的笔记系统下进行规范化和归档,主要需要添加一个 YAML header 以供 blog 渲染
- essay 一般直接在 typora 中完成
- collection 则包含了一些需要快速查阅的内容 (如 shortcuts),之后可以考虑迁移至 notion
- 另外笔记系统中不包含 YAML header 的文档不得引用云端资源,否则在云端资源清理 (slim) 的过程中会 break 掉
- Wisdom:
还没到这个层次
最后,出于求异和 put together 的目的:
- 大部分课程笔记 (少量 csdiy) 不归档到笔记系统中,而是与课程 (csdiy) 相关的资料放在一起,引用本地资源
- 一些纯代码的笔记抽取整理后托管到 github 上
- 一些古早的笔记 (onenote 时期和前 typora 时期) 直接 archive 掉,不再维护
blog
升级博客主题至 AstroPaper v3
渐变效果 👍
2023.7
外部资源汇总
- sm.ms
- 个人主页的头像
- qq 和 wechat 的二维码
- OG image 所需的图片背景
- aliyun oss
- 图床,包括图片和视频资源
- memos
- 纯文本与外部资源 (存储在云服务器上)
- notion
- 云端存储 (学生认证后)
子域名
来自软工三助教的建议
期望 xxx.vgalaxy.work 可以重定向到 vgalaxy.work:xxxx
两步走:
- 在 DNSPod 中添加对应的解析
- 修改
/etc/nginx/nginx.conf添加下述内容
server { listen 80; server_name fat12.vgalaxy.work; location / { proxy_pass http://150.158.197.57:4000; # 将子域名转发到指定端口 proxy_set_header Host $host; proxy_set_header X-Real-IP $remote_addr; proxy_set_header X-Forwarded-For $proxy_add_x_forwarded_for; }}notion
偶然体验了 notion 导入和导出 markdown 的功能,感觉还可以接受,于是考虑将 todo 部分迁移至 notion
迁移过程中遇到了下述问题:
- 导入
- 数学公式 (包括块语法和内联语法) 无法自动识别
- 代码块
- 手动复制源码,代码块最后会多一行
- 从 typora 中直接复制代码块,需关闭代码行号,否则开头会多一个空格
- (import) 链接无高亮
- ……
- (重点) 免费版云端存储只有 5MB
- 这意味着 notion 文档中的图片需要额外使用图床存储,管理起来实在麻烦
- 然后发现可以学生认证(
site
添加了更多的 social icons
blog
又换博客框架力,照例记录下原博客
实习摸鱼的时候调研了下静态网页生成框架,我的需求其实很简单,在 Typora 中记录的文档最多通过添加一些元信息即可通过框架生成对应的页面,同时尽可能保证 Typora 中可视化的结果与最终的页面一致。
一波网络冲浪之后看到了 AstroPaper 这个基于 Astro 前端框架的主题,于是尝试迁移,迁移过程中遇到了一些波折:
- LaTeX 渲染
参考 https://docs.astro.build/en/reference/configuration-reference/#markdownremarkplugins 和 https://github.com/remarkjs/remark-math 即可
- post 元信息不一致
详见文档,写个 Python 脚本迁移一轮即可
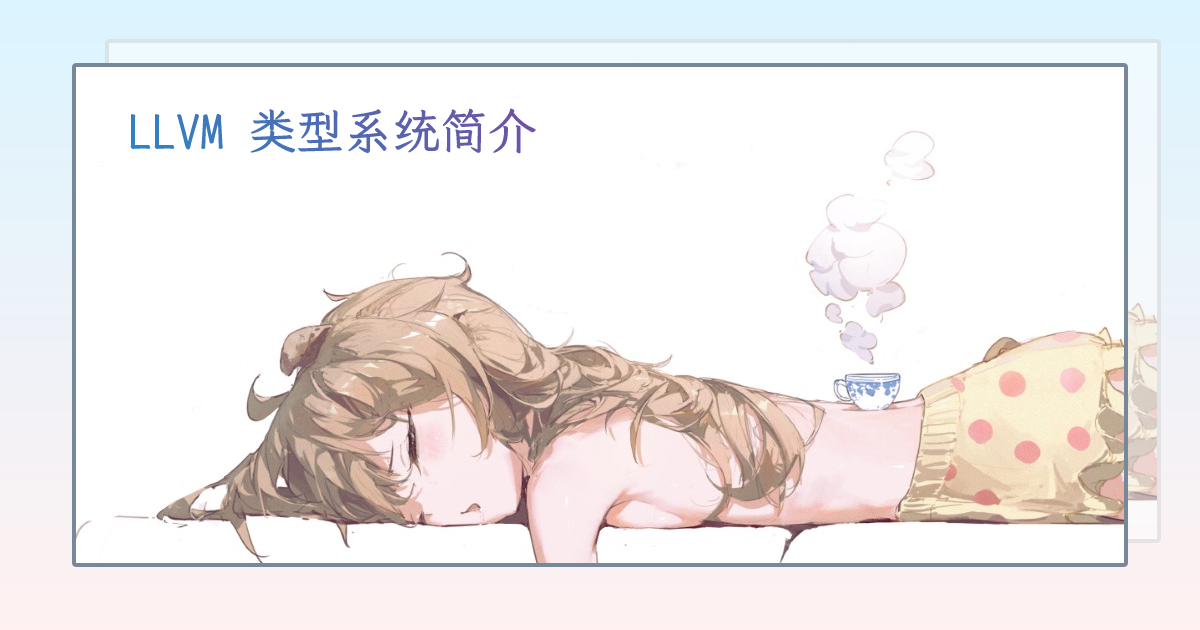
- Open Graph Protocol
一个简单的例子比如

主题可以自动为 post 生成 OG image,主要利用了框架的动态路由功能,配合 vercel 在构建阶段为每篇 post 生成对应的 svg 文件,并渲染为 png 文件作为 OG image
注意 [xxx].svg.ts 这个文件,其中 xxx 的取值即为最终 svg 文件的文件名,考虑到 post title 往往存在空格,于是考虑将每篇 post 的 postSlug 作为文件名,同时在 props 中传入 title,用于之后生成 svg 文件
export function getStaticPaths() { return posts .filter(({ data }) => !data.ogImage) .map(({ data }) => ({ params: { ogSlug: data.postSlug }, props: { ogTitle: data.title } }));}之后可以游玩 Vercel OG Image Playground,最终的效果如下
- 目录
TOC 替换,要求 TOC 的 heading 层级与需要形成目录的最外围 heading 层级一致,具体可以参考
https://github.com/remarkjs/remark-toc#use
- remove quote around inline code and blockquote
对于 inline code 主题作者是这样去除的
prose-code:before:!content-[''] prose-code:after:!content-['']对于 blockquote 可以考虑这样去除 (待验证)
p::before { content: "" !important;}p::after { content: "" !important;}- code language
c++ -> cpp否则无法识别
- image lazy load
aliyun oss 外网流出流量飙升,记下价格
00:00 ~ 08:00 - 0.25 元 / GB08:00 ~ 24:00 - 0.50 元 / GB- compatibility
目前的博客主题框架较新,兼容性也比较激进,已经观察到了页面布局异常的情况
- dark mode 下数学公式块颜色显示异常
如图所示,情况还比较复杂
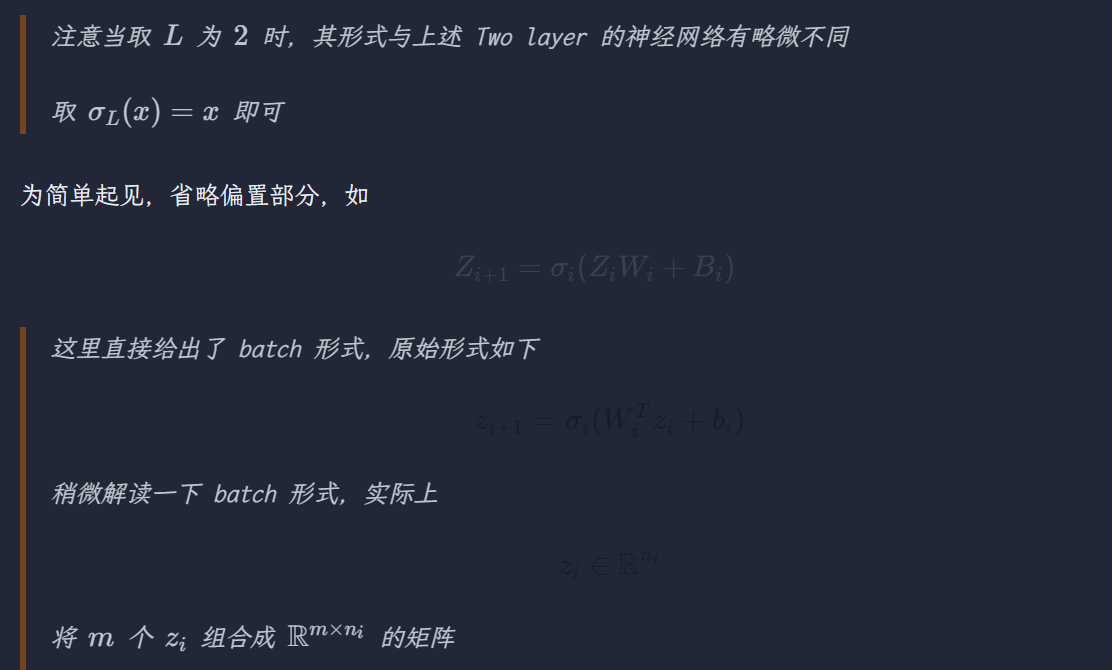
目前将 dark mode 也设置成一个 light mode 暂时规避
- mermaid 支持
参考 https://github.com/temando/remark-mermaid
首先是安装
npm install @dendronhq/remark-mermaid配置 simple mode 为 true,即原地生成 svg 代码
然后参考 Mermaid | Calling the JavaScript API,添加
<script type="module"> import mermaid from 'https://cdn.jsdelivr.net/npm/mermaid@10/dist/mermaid.esm.min.mjs'; mermaid.initialize({ startOnLoad: true });</script>由于博客中存在其他 elements 也是 svg,所以需要添加样式
div.mermaid svg { @apply w-full h-auto}- word break
这个问题在移动端较为明显,甚至发现了一个相关的 issue
可参考 word-break - CSS: Cascading Style Sheets
感谢某前端 RD 指点
当然数学公式块就没有办法了
- headings 微调字体大小及 margin
- 更改 date 格式
- 代码块不要自动换行
参考 https://github.com/satnaing/astro-paper/pull/102 即可
记得加上 word-break: keep-all;
2023.1
site
优化个人主页,使用 svg + href 的风格,例如
<div class="social-icons"> <!-- github --> <a href="https://github.com/VGalaxies" target="_blank" rel="noopener noreferrer me" title="github"> <svg xmlns="http://www.w3.org/2000/svg" viewBox="0 0 24 24" fill="none" stroke="currentColor" stroke-width="2" stroke-linecap="round" stroke-linejoin="round"> <path d="M9 19c-5 1.5-5-2.5-7-3m14 6v-3.87a3.37 3.37 0 0 0-.94-2.61c3.14-.35 6.44-1.54 6.44-7A5.44 5.44 0 0 0 20 4.77 5.07 5.07 0 0 0 19.91 1S18.73.65 16 2.48a13.38 13.38 0 0 0-7 0C6.27.65 5.09 1 5.09 1A5.07 5.07 0 0 0 5 4.77a5.44 5.44 0 0 0-1.5 3.78c0 5.42 3.3 6.61 6.44 7A3.37 3.37 0 0 0 9 18.13V22"> </path> </svg> </a></div>由于 PaperMod 对 icons 的支持有限,所以需要手动修改 index.html,添加自定义的 svg 代码,同时锁定主题为 light 风格
后来发现可以扩展
layouts/partials/svg.html
assets
扩展图床的概念,目前支持如下文件类型
- 图像:jpg / png / svg / gif / jpeg / bmp / …
- 视频:mp4
- 音频:mp3
其对应的正则表达式如下 (Python)
pattern_md = r".*?!(\[.*?\])\((.*?)\).*?"pattern_html = r".*?<(img|video|audio) src=\"(.*?)\" alt=(\".*?\").*/>.*?"对于视频和音频格式,可以参考这里,这里要求加上 alt 属性
但是在实际的 blog 中,无法像 Typora 那样进行预览,所以仅用于备份
对于 pdf 格式,参考了这个 gist,但是没有达到预期的效果,可以考虑存储在 Google Drive 中,和图床区分开来
目前不考虑本地化 <iframe> 引用的资源,其来源有
- 网易云音乐
- 小破站
- 油管,参考 https://developers.google.cn/youtube/player_parameters?hl=zh-cn#Manual_IFrame_Embeds
font
参考这个项目,将博客默认字体设置为 LXGW WenKai Mono,但需要客户端安装对应的字体
后来发现
@font-face压根没起作用 🤣 在<head>中引用下面的内容即可
2022.12
图床
向云端部分妥协
由于考虑将记笔记的工作从 Typora 部分迁移到 Obsidian,而 Obsidian 对于 <img> 标签引用的本地图片支持并不完善,所以考虑使用 PicGo 配合华为云图床,以支持 markdown 文档中的图片甚至视频资源。
自动化方面,由于图片链接已经自动转换为了图床形式,所以部署实际上只需要一步拷贝即可。由于图床中可能包含一些未被任何 markdown 文档引用的冗余资源,所以考虑定期下载图床中所有被引用的资源到本地,然后删除图床中的 assets 文件夹,将所有资源随机化重命名后,再次上传到图床。
Auto Correct
- 背景
笔记写作风格的统一,对我而言一直是一个比较头疼的问题。大一上学期我一直使用 OneNote 在云端记笔记,由于大一寒假的时候险些发生过一次大面积的笔记丢失惨案,所以从那时开始,我与所有的云端笔记软件光速切割,开始尝试使用 Typora 记笔记。那时候记笔记比较随意,最致命的一点就是中英文之间不加空格。后来逐渐了解到了一些中文文档的写作规范,但是之前已经写了大量的笔记,如果一个一个改,工作量过大。
热知识:在 Typora 中键入
<Shift + F12>打开开发者工具
- 可能的解决方案
在比较之后,我使用了下述三个脚本进行文档的 Auto Correct
- https://github.com/huacnlee/autocorrect
- https://github.com/lint-md/lint-md
- https://github.com/hjiang/scripts/blob/master/add-space-between-latin-and-cjk
autocorrect --fix tmp.md ; lint-md tmp.md --fix ; curl -s https://gist.githubusercontent.com/VGalaxies/d07d39ccfcb10655baeb63b71bd009e2/raw/6ef0d9cab1a88dc6391f022643fc6eebf3c45292/fix.py | python3 - tmp.md由于文档的复杂性 (之前过于随意),在 Auto Correct 后仍然需要一定的时间进行校对
之后这些脚本可以用于 lint 而非直接 fix
Image Loading
需要为图片懒加载添加一个加载图片。最初的想法是添加一个透明背景的 gif 图片,为此参考了这个视频进行手动抠图,结果发现在 dark mode 下透明背景还是会被转换为白色背景。最终选择了 loading cat 作为加载图片

2022.11
自动化部署
流程
- 在本地写作,需要部署的文档添加 YAML header
- 使用脚本完成如下工作
- 拷贝文件夹中所有包含 YAML header 的文档,若存在图片文件夹,一并拷贝
- 转换文档中的图片链接为图床形式
- 将图片文件夹上传至图床
- hexo generate
- 使用 scp 命令拷贝 public 文件夹至云服务器并部署
公式渲染
在使用了脚本简化了博客部署全过程后,可以仔细分析公式渲染的问题
博客目前使用的渲染器为 MathJax,参考 https://github.com/mathjax/MathJax/issues/2312
- 将
\\替换为\newline - 将
\|替换为\parallel
使用如下代码渲染多行公式
\begin{array}{l}aaa \newlinebbb \newline\end{array}左对齐
\begin{align}aaa \newlinebbb \newline\end{align}右对齐
部分公式仍无法正确渲染,例如
\left和\right.
u=\left\{\begin{array}{l} \frac{3}{16} & u = 3 \newline \frac{3}{8n} & \text{otherwise}\end{array}\right.此时需要使用 cases env
u=\begin{cases}{c} \frac{3}{16} & n = 3 \newline \frac{3}{8n} & \text{otherwise}\end{cases}- 花括号
\{\}- …
2022.8
ssh
需求
- 无需密码登录远程主机
- 登录时自动执行命令
为此需要为云服务器绑定密钥,可以参考
- https://cloud.tencent.com/document/product/1207/44643
- https://cloud.tencent.com/document/product/1207/54228
ssh -i <已下载的与实例关联的私钥文件的路径> <username>@<IP address or domain name>scp 命令也适用
更一般的多密钥情形,可以参考
- https://zhuanlan.zhihu.com/p/154604608
- https://juejin.cn/post/6844904086085582862
- https://www.howtouselinux.com/post/ssh-known_hosts-file
对于第二个需求,可以参考
https://superuser.com/questions/355029/how-to-automatically-run-commands-on-ssh-login
修改 ~/.bashrc
if [[ -n $SSH_CONNECTION ]] ; then echo "I am logged in remotely" sudo nginx -s reloadfidomain
- 域名注册
https://console.cloud.tencent.com/domain/all-domain
- 域名解析
https://console.cloud.tencent.com/cns
- 备案
https://console.cloud.tencent.com/beian
然后对主题的 footer 进行修改
diff --git a/layout/_partial/footer.ejs b/layout/_partial/footer.ejsindex 4b041a3..b732430 100644--- a/layout/_partial/footer.ejs+++ b/layout/_partial/footer.ejs@@ -37,4 +37,5 @@ <% } %> </div> <% } %>+ <p align="center"><a href="https://beian.miit.gov.cn/">苏 ICP 备 2022034061 号</a></p> </div>或者修改 _config.oranges.yml 中的 footer
- ssl
https://console.cloud.tencent.com/ssl
修改配置文件 /etc/nginx/nginx.conf
放置在 http 块内
server { # SSL 默认访问端口号为 443 listen 443 ssl; # 请填写绑定证书的域名 server_name vgalaxy.work; # 请填写证书文件的相对路径或绝对路径 ssl_certificate ssl/vgalaxy.work_bundle.crt; # 请填写私钥文件的相对路径或绝对路径 ssl_certificate_key ssl/vgalaxy.work.key; ssl_session_timeout 5m; # 请按照以下协议配置 ssl_protocols TLSv1.2 TLSv1.3; # 请按照以下套件配置,配置加密套件,写法遵循 openssl 标准。 ssl_ciphers ECDHE-RSA-AES128-GCM-SHA256:HIGH:!aNULL:!MD5:!RC4:!DHE; ssl_prefer_server_ciphers on; location / { # 网站主页路径。此路径仅供参考,具体请您按照实际目录操作。 root /var/www/blog; index index.html index.htm; }}然后 sudo nginx -t 即可
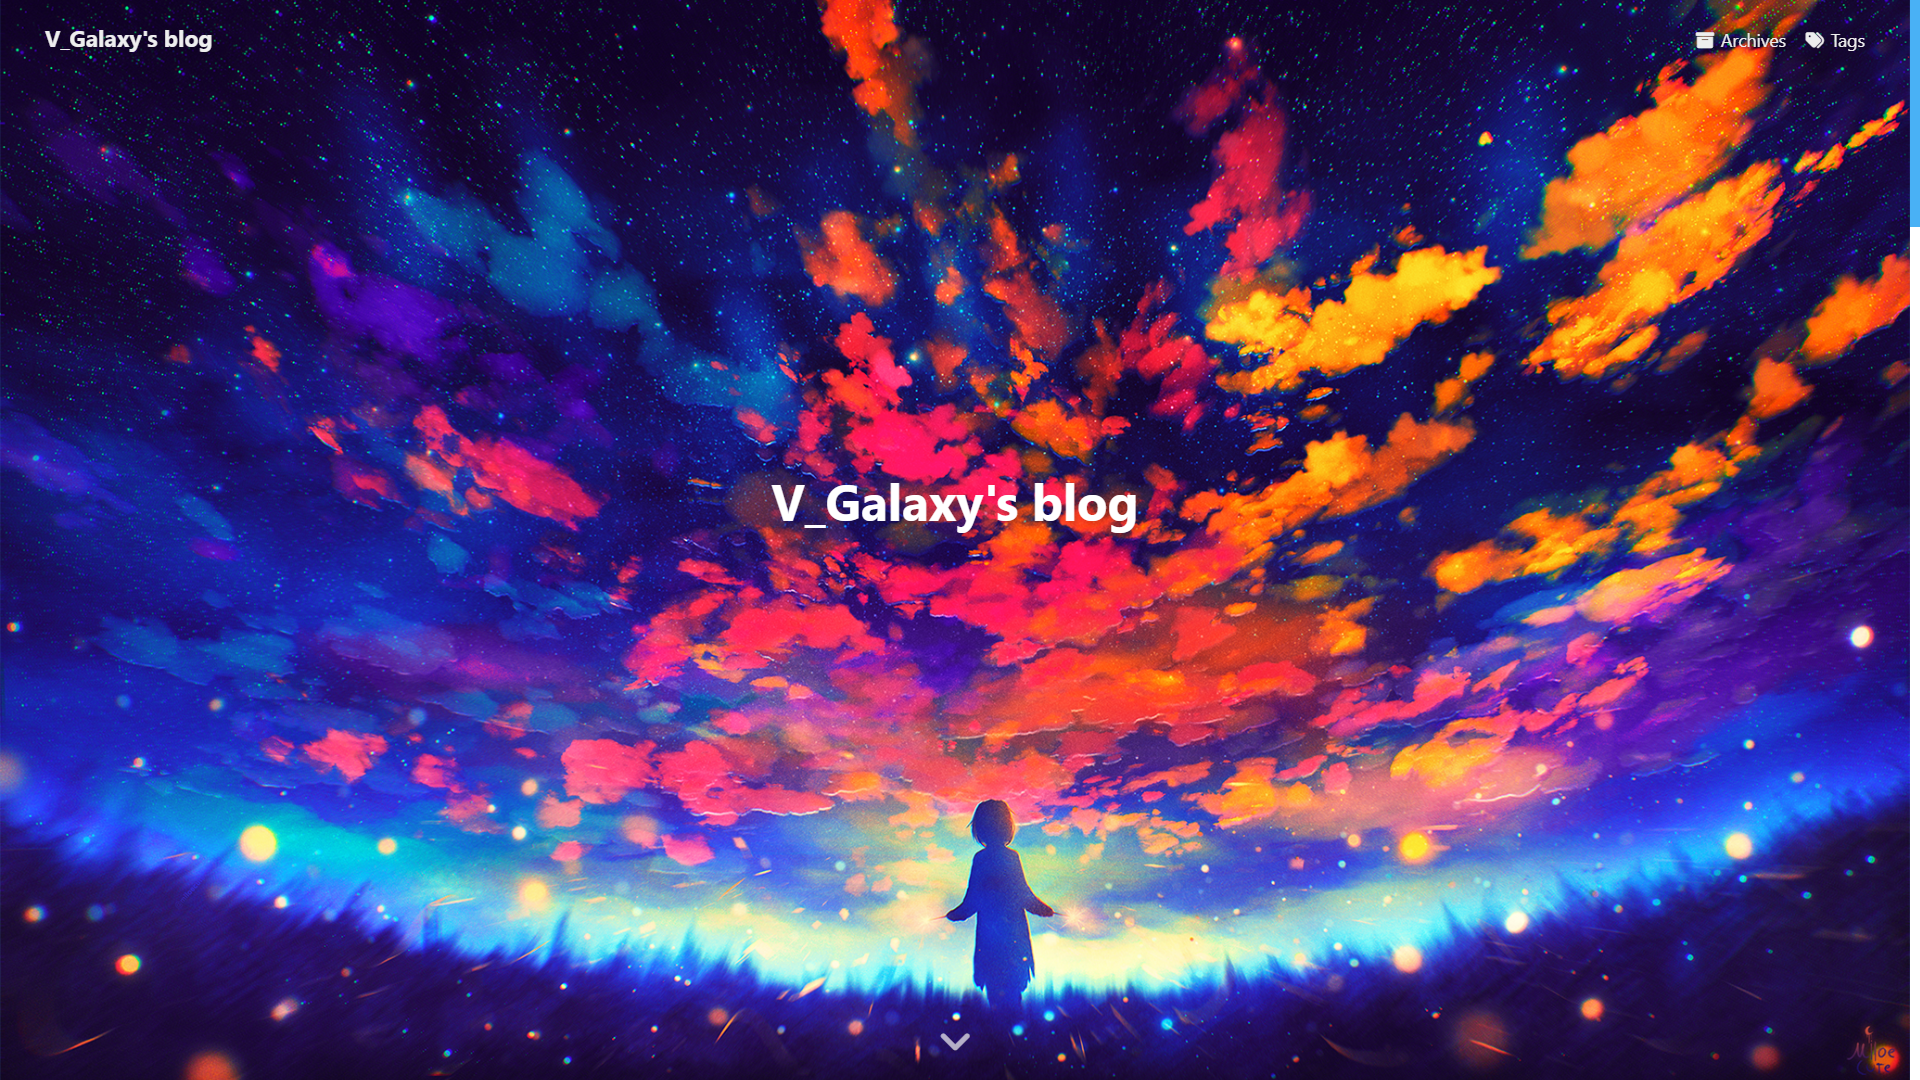
2022.7
先截图记录一下原博客
初始化
git clone git@github.com:VGalaxies/hugo-site.githugo new site hugo-site --force -f ymlcd hugo-site/git clone https://github.com/adityatelange/hugo-PaperMod themes/PaperMod --depth=1git submodule add https://github.com/adityatelange/hugo-PaperMod themes/PaperModhugo serve -Dhugo -D简单配置一下
baseURL: https://vgalaxies.github.iotitle: V_Galaxy's sitetheme: "PaperMod"
params:  profileMode:    enabled: true    title: "Hi there \U0001F44B" # optional default will be site title    imageUrl: "https://vgalaxy.gitee.io/img/avatar.JPG" # optional    imageWidth: 120 # custom size    imageHeight: 120 # custom size    buttons:      - name: "Blog \U0001F4DA"        url: "https://vgalaxy.gitee.io/"      - name: "Github \U00002328"        url: "https://github.com/VGalaxies"
将网页部署到 github 上
页面配置模板
参考 https://adityatelange.github.io/hugo-PaperMod/posts/papermod/papermod-variables/#page-variables
---title: "{{ replace .Name "-" " " | title }}"date: {{ .Date }}author: ["V_Galaxy"]
categories:tags:description: ""weight:
draft: false
hidemeta: falsesearchHidden: truehideSummary: truedisableShare: truecomments: falseShowCodeCopyButtons: trueShowWordCount: trueShowBreadCrumbs: true
showtoc: truetocopen: true---
使用 KaTeX 渲染数学公式
更多参考
https://www.sulvblog.cn/posts/blog/
后来看到 jjppp 的 blog,决定使用 Hexo + oranges
Hexo 还是那几条命令
hexo serverhexo generatehexo cleanhexo deploy使用 MathJax 渲染数学公式,发现了公式不换行的问题
参考 https://github.com/mathjax/MathJax/issues/2312
将 \\ 替换为 \newline
部分公式仍无法正确渲染,可能是因为写法不规范 or 解析器 or 渲染器的问题
需要递归的从远程仓库拉取代码
git clone --recursive git@github.com:VGalaxies/hexo-site.gitnpm install并修改 source/images/avatar.xxx
或者考虑删除子仓库的 .git
2022.2
从 Jekyll + Github Page 变为 Hexo + Github Page 方案,主题为 Butterfly
建站
新建文件夹 hexo-blog
npm install -g hexo-clinpx hexo init .npm install其中可能需要 npm audit fix —force
部署
修改 _config.yml
# Deployment## Docs: https://hexo.io/docs/one-command-deploymentdeploy: type: git repo: https://github.com/VGalaxies/VGalaxies.github.io.git branch: main再安装
npm install hexo-deployer-git --save然后键入如下命令
npx hexo cleannpx hexo gnpx hexo d请记住这三件套
主题
Butterfly - A Simple and Card UI Design theme for Hexo
官方文档很详细,不再赘述
配置方向如下:
- Front-matter
- date
- description
- cover
- katex
- 分类页和标签页
- 语言
- 网站资料
- 导航菜单
- Archives
- Tags
- 主页文章节选
- description
- 代码
- 顶部图
- 默认
- 一般为文章封面
- 文章封面
- cover
- 头像
- 网站图标
- 字数统计
- Math 数学
- katex
已知问题
- 使用 Markdown 格式的图片链接时,若图片名中含有空格,则无法识别
- 推荐使用 HTML 格式的图片链接
- 加载图片速度堪忧
- LaTeX 公式
- 书写需规范
- 无法识别 Typora 的小红点
- 为此放弃了 isomorphism
- 科学上网?关闭相关文件?薛定谔的公式?
- 好像需要开启 per_page 才管用?
- 有些配置要想生效,需要先 clean 并清除浏览器缓存
- generate 后别忘了手动将图片内容复制到 public 文件夹,最后再 deploy
- 对 Tab 的解读似乎并非 4 个空格
- 于是我放弃了 Tab
工作流
- 使用一个 Python 脚本将图片的相对引用转换为 Github 图床形式
- 将转换后的文档置入 _post 文件夹中,并在 generate 后复制图片至 public 中,最后再 deploy
2021.8
Jekyll + NexT
这是博客的模版 NexT
使用中发现的一些问题:

- 代码中的一些特殊字符会影响界面构建,如上图所示(不敢写出来🤣)
- 无法显示数学公式,模版中使用的是 MathJax,研究了一下发现自己的知识储备量不够,不能理解为什么无法显示,另外上传到 Github 的 Markdown 文件也无法显示数学公式
- 插入图片较为繁琐,需要将图片上传 Image Upload 得到地址,在本地也需要备份
- 另:使用 Github 作为图床
https://vgalaxies.github.io/pic/...
- 另:使用 Github 作为图床